9200-5 ACCESSING EIS, ACSESS, AND SAM
In most situations, those accessing state systems outside of the State of Alaska firewall must do so through a VPN account using WebConnect. Once signed into the VPN, users can access EIS through the Mainframe, and ACSESS and SAM through the internet.
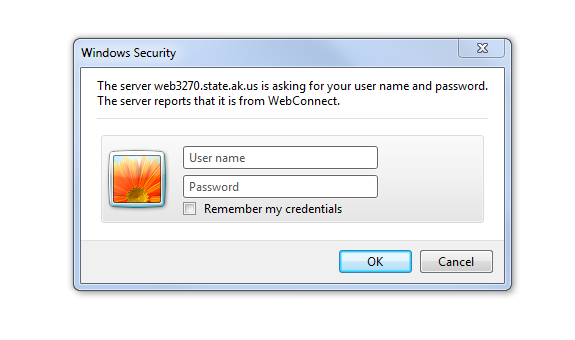
Before accessing EIS, you must connect the WebConnect client using the following steps.
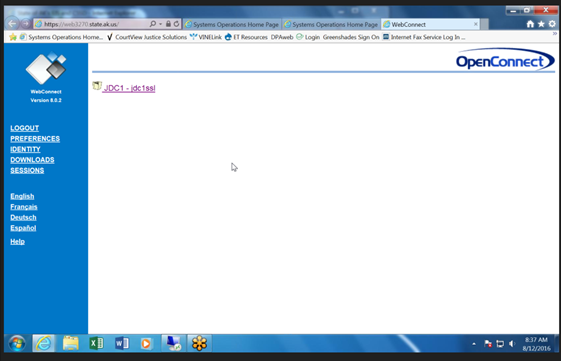
Step 1: https://web3270.state.ak.us/
Step 2: Enter your SOA username and password
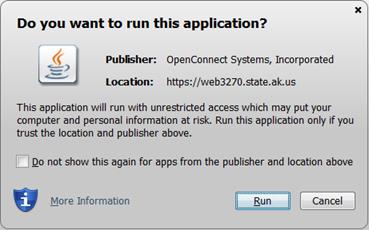
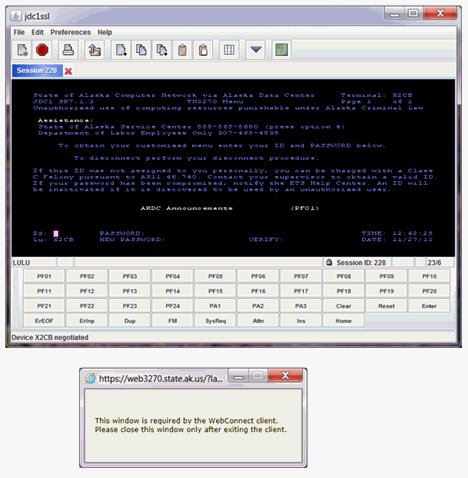
You might see this screen asking permission to run the JAVA application. If you get any JAVA error messages, you will need to contact your IT section for assistance.
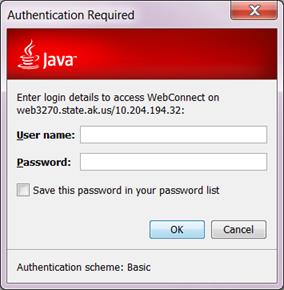
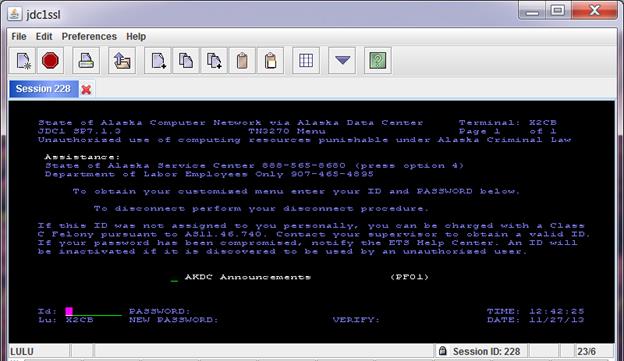
If you see the JAVA login screen, you will need to use your State of Alaska (SOA) username and password.
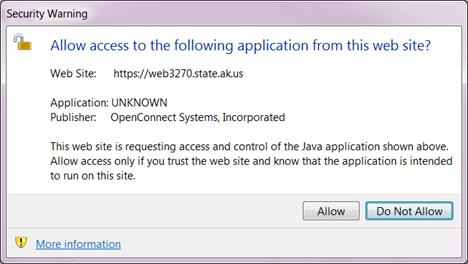
Afterwards you may have to give permission to allow your system to run OpenConnect.
Step 3: Select the JDC1-jdc1ssl link
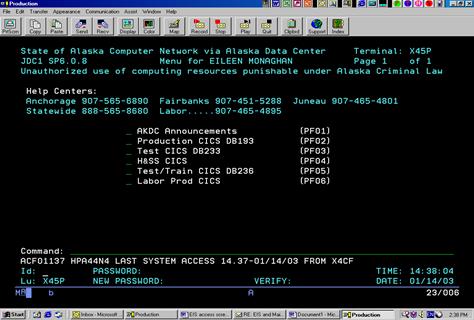
Step 4: You made it to the Mainframe
Finally, you will see the Mainframe logon screen along with a small pop-up window that is required to stay open to be connected to the WebConnect client.
9200-5 B. SIGNING ON TO THE MAINFRAME AND EIS
Signing into the Mainframe will allow you to access EIS to view information on public assistance cases.
Note:
The instructions tell you to press the <ENTER> key, however, some keyboards require that you use the <CONTROL> key instead of the <ENTER> key for some of these functions.
Before signing in for the first time, you need to think about creating your own password. The temporary password you'll be sent is only good for 24 hours. It must be changed the first time you sign in or you will need to wait for another temporary password to be sent to you.
Certain requirements must be followed in order for your new password to be accepted:
Password Examples
| Good Password | Unacceptable Password | Reason Not Acceptable |
| 52Years! | 52Yeers! | Repeating Characters |
| D0hpawrk | Hpadpmw | Logon ID, no numeric character, and only 7 characters |
| 1pass2go | SepNFAP01 | Banned beginning and 9 characters |
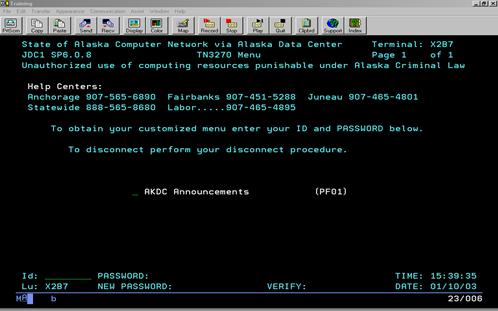
The first screen you see after signing on through OpenConnect is the Mainframe screen.
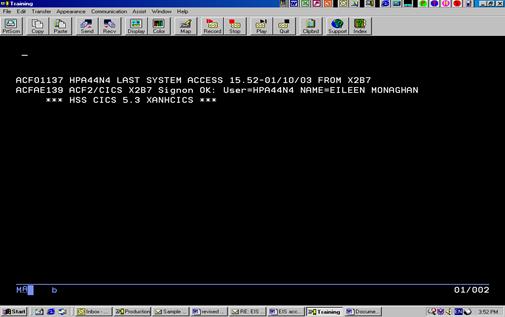
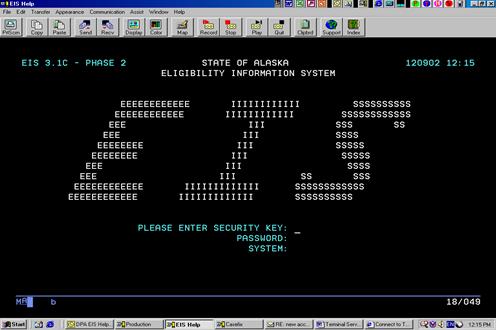
3. Signing onto EIS
9200-5 C. SIGNING ON TO SAM
SAM (Secure Access Manager) is the Department of Labor's unemployment benefit system. Use this link to access SAM.
When you reach the web page, you will see a drop-down menu. Click on the arrow and choose "All Other Users" then click the button to continue to sign in.
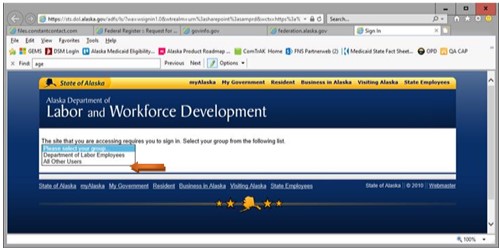
A new window will come up showing the email provided to you by the State of Alaska and asking for you password.
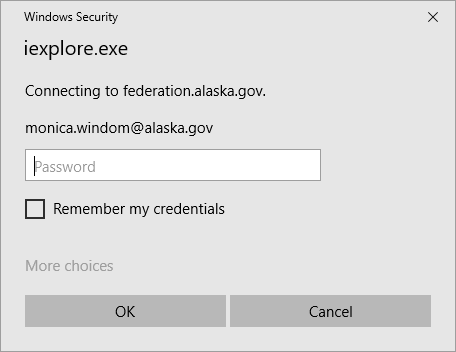
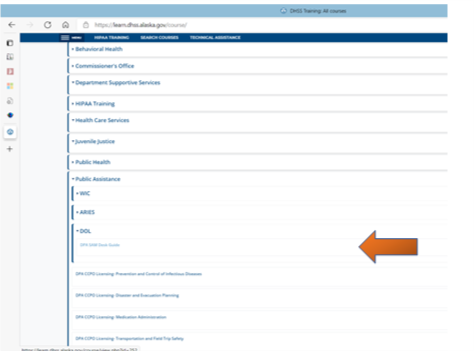
Enter the password for your State of Alaska ID to complete your sign on. Information about navigating SAM can be found in the Learning Management System: https://learn.dhss.alaska.gov/login/index.php.
Child support information is now accessed through ACSESS. To request access to ACSESS, the following forms are required:
Agencies should submit their ACSESS forms directly to CSED at dor.csed.helpdesk@alaska.gov.
| Previous Section | ||
| MC #13 (12/25) |